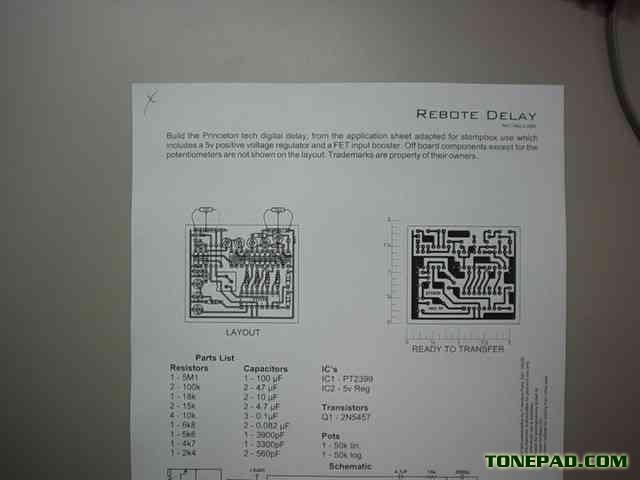
This essay will cover the process of making a PCB for Francisco's Rebote delay project, although it could just as easily be any of the FX projects on this site. None of the steps discussed are particular to this project.
Here's what you will need:
A sheet of Press 'N Peel blue, available from Small Bear Electronics
Access to a laser printer or photocopier
A copper blank
A hacksaw or Dremel tool with cutting attachment
An ironing board, iron, and block of wood or similar
Tape and scissors
Print the layout file using whatever method you will use to apply the Press N Peel (laser printer or photocopier -- ink jet will NOT work). When doing the printing, make sure that "Fit To Page" is NOT selected if you are working from a PDF. This can mess up the scale.
I'm going to feed mine through a laser printer. Notice that before printing, I put an X in the corner of the paper. I then put the paper in the printer with the X facing up and in the upper left corner. This will help keep track of printer or copier weirdnesses, such as the paper being flipped or turned inside the machine. |